Cable Management Saves the Day!
After lots of hesitation on if I should or not give another shot at what I used to proudly call a “cable optimization job”, I finally got off my chair to crawl under my desk and get the damned thing done. After some 2 hours of messing around my case in a spine-bending posture, it’s done.
BEFORE!
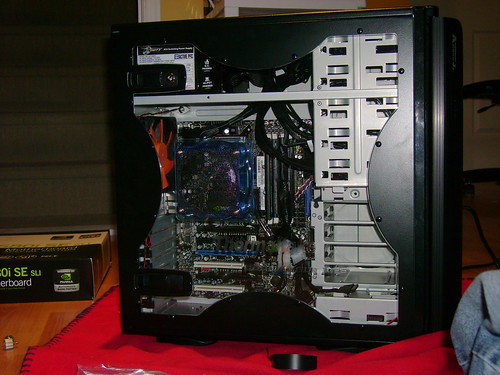
AFTER!
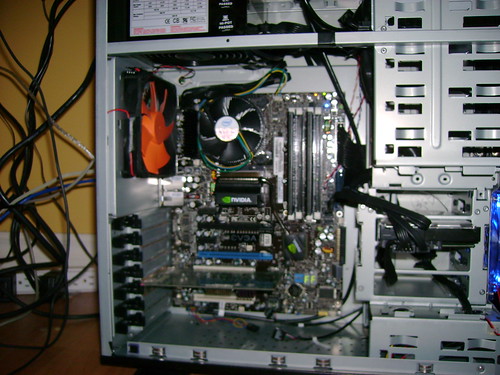
Turns out it was pretty easy too. Thermaltake, being the best cooling product company that they are, design the left side panel on the Armor JR so that there is a good ~10mm of clearance between the motherboard tray, and ideal place for stuffing the overly long power cables that my X-finity has. Appropriately bundled and tied to the mobo tray with electrical tape, it's a zero cable clutter solution. For the extra long cables, I could even bundle them up and stick them next to the powersupply, which gave me a clearance of something like 30 mm. Not a cable escapes the routing: the SATA power cables and molex are placed beneath the side panel and come out from the bottom slot of the hard drive bay, the top bezel pinning connectors are also routed the same way, and even the bigass 24 pin connector was butted against the MB plate, to then come out from the thin gap between the 5.25 drive bay rack and the motherboard. As for the molex which used to spoil the entire bottom right corner of my window, I have hidden them in the bottom 5.25" bay below the blue fan, and after carefully having routed all the fan cables, connected all the fan molex under there. It's a tight fit, but it does the job.
Results? 4C off my idle temperatures, thanks to an almost perfectly cable free path from the front panel to the back fan, which also includes my CPU cooler. That and a presentation grade PC. With the window on, the only cables really visible are the ugly stock, uber long SATA cable, the PCI-e power connection going to my 8800 GTS SC that I am getting next Tuesday, and the USB pinning for the bezel at the top of my case, which I don't want to pin up because that means looking through the motherboard manual.
Now that the 8800 is purchased, the to-do list on this build is getting shorter and shorter.
- Install the side panel fan assembly, with the removable, clutter free powering system.
- Install another blue 120 mm fan in the 3 available 5.25 slots, with the custom machined bracket
- Change the CPU cooler to a Thermaltake V1, make it machine lapped
- Install aftermarket Tt 8800 series GPU cooler
- Change the back case fan to a blue one
- Install some active RAM cooling with lighting
- Add another 2 gigs of RAM
- (Probably) Add another 8800 GTS.
This thing is gonna be worthy of magazines, I tell ya!